
Microservices 101: A Simple Example.
Creating a Mini-Blog App with a Microservices Approach for the Backend.


Welcome back to the next segment of our journey through the world of microservices. If you've already read my preceding microservices blog, excellent! But if not, no worries – just make sure you've grasped the foundational concepts of microservices, and you're all set. In this blog post, we're going to dive headfirst into constructing a compact blogging application. For this endeavor, we'll harness the power of microservices architecture to design our backend. This hands-on project will provide you with a comprehensive understanding of how microservices function.
Without any further delay, let's plunge right into the action! 🚀
Recap: What Are Microservices?
Visualize your app as a puzzle, with each piece of the puzzle serving a distinct purpose. Microservices are akin to these puzzle pieces. Rather than having a single monolithic structure that handles everything, you segment your app into these diminutive entities – microservices – each fulfilling a specific role. These microservices can communicate with one another and with users through explicit instructions (such as APIs), which collectively bring the entire app to life.
The Blueprint of Our Project
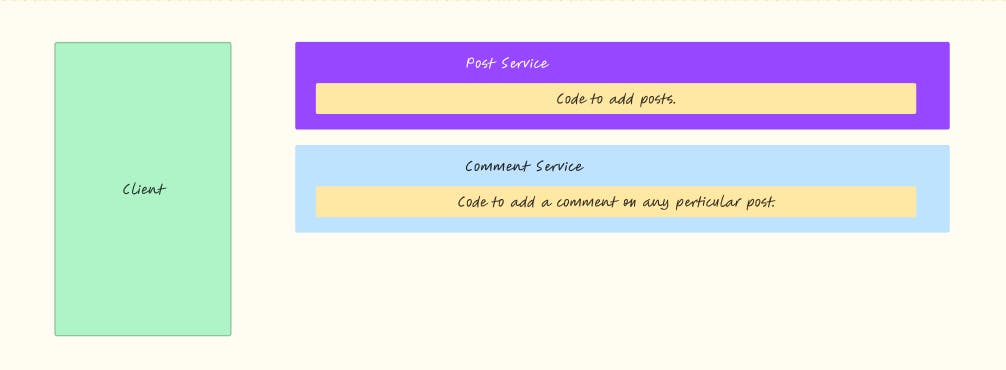
We're poised to construct a mini-blog application backed by the microservices architecture backend. This application will let the users to create posts, and add comments on any already created post, and retrieve a list of all available posts.
Our backend architecture will be partitioned into three autonomous microservices:
Post Service: Responsible for enabling users to create posts.
Comment Service: Empowering users to leave comments on posts.
Query Service: Facilitating users in querying and retrieving the pool of available posts.
The beauty of this setup lies in its independence – should one service encounter issues, the others can continue to operate. This not only enhances the application's resilience but also fosters a more robust user experience.
All the code that I have used in this tutorial is available here.
A Point to Remember: This is a Learning Thing
Before we plunge into the nitty-gritty, a quick note. The tasks we're undertaking here are akin to practice rounds. This isn't meant for heavyweight, production-grade applications – it's all about understanding the mechanisms at play.
Prerequisites:
To actively engage with this article, ensure you have:
A foundational understanding of Node.js
Basic familiarity with Express
A grasp of React.js fundamentals
Basic awareness of Axios
Tools We'll Use:
For our project, we'll use:
Node.js
React.js
Express.js
Starting Off
To save time, I've already set up the boilerplate code. This way, we can dive right into designing the microservices architecture for our backend.
- Begin by cloning the starter repository:
git clone https://github.com/adityabhattad2021/microservices-blog-app.git
- Navigate to the project folder:
cd microservices-blog-app
Structure of the Project Directory
Here's how the project is organized at the moment:
blog-app
|-- client
|   |-- public
|   |-- src
|   |   |-- index.js
|   |   |-- App.js
|   |   |-- Components
|   |       |-- Commentlist.js
|   |       |-- CreateComment.js
|   |       |-- CreatePost.js
|   |       |-- PostCard.js
|   |       |-- Postlist.js
|   |   |-- App.css
|   |   |-- App.js
|   |   |-- App.test.js
|   |   |-- index.css
|   |   |-- logo.svg
|   |   |-- reportWebVitals.js
|   |   |-- setupTests.js
|   |-- .gitignore
|   |-- package.json
|   |-- README.md
|   |-- tailwind.config.js
|-- Post Service
|   |-- .gitignore
|   |-- package.json
|-- Comment Service
|   |-- .gitignore
|   |-- package.json
|-- Query Service
|   |-- .gitignore
|   |-- package.json
|-- Event Bus
|   |-- .gitignore
|   |-- package.json
Get started by, Installing Dependencies:
Run the following command to install dependencies in all relevant folders at once:
- For Linux or Mac users:
# This will run npm install in all the relevant folders
for dir in "client" "post-service" "comment-service" "query-service" "event-bus"; do (cd "$dir" && npm install); done
- For Windows users:
# This will run npm install in all the relevant folders
"client", "post-service", "comment-service", "query-service", "event-bus" | ForEach-Object {cd $_; npm install; cd ..}
Post Service
Let's begin by crafting the post service, enabling users to add posts. Within the "post-service" folder, create index.js. In this file, we'll set up a listener on port 4000 (you can choose an alternative port if necessary, just ensure distinct ports for different services).
Here's the content of index.js:
const express = require("express");
const cors = require("cors");
const { randomBytes } = require('crypto');

const app = express(); // Creating an instance of Express

app.use(express.json()); // Middleware for parsing JSON in request body
app.use(express.urlencoded({ extended: true })); // Middleware for parsing URL-encoded data
app.use(cors()); // Adding CORS middleware
const PORT = 4000;

app.listen(PORT, () => {
    console.log(`Post Service live at port: ${PORT}`);
});
In post-service folder, Upon executing npm start in the terminal, you should see an output resembling:

With the post service in place, let's introduce a route for post creation:
// We should have ideally used database to store posts but we will instead use an in-memory storage for posts to keep things less complicated.
// Note: This approach loses posts on code changes due to nodemon restarting the code.
const posts = {};

app.post('/posts/create', (req, res) => {
  const id = randomBytes(4).toString('hex'); // Generate a random ID for the post object.
  const { post } = req.body;
  posts[id] = {
    postId: id,
    post: post,
  };
  res.status(201).send(posts[id]);
});
Furthermore, let's implement a GET route to retrieve all posts:
app.get('/posts', (req, res) => {
  res.status(200).send(posts);
});
Superb! Our post service is primed for action. 🥳
Now, let's proceed to test our post service. I an currently using a useful VS Code extension named Thunder Client. It's a lightweight REST API client that simplifies testing. Of course, feel free to use any API testing tool you prefer. When testing the correct route, you'll receive a post object in return
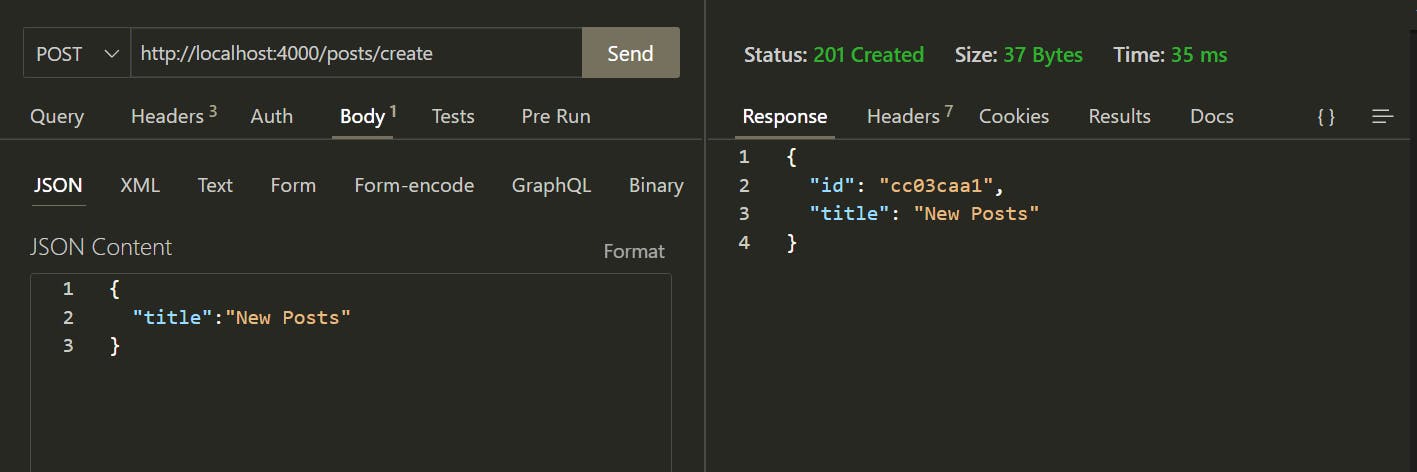
For comprehensive testing, consider creating a few more posts. This allows us to thoroughly assess the effectiveness of our GET route.
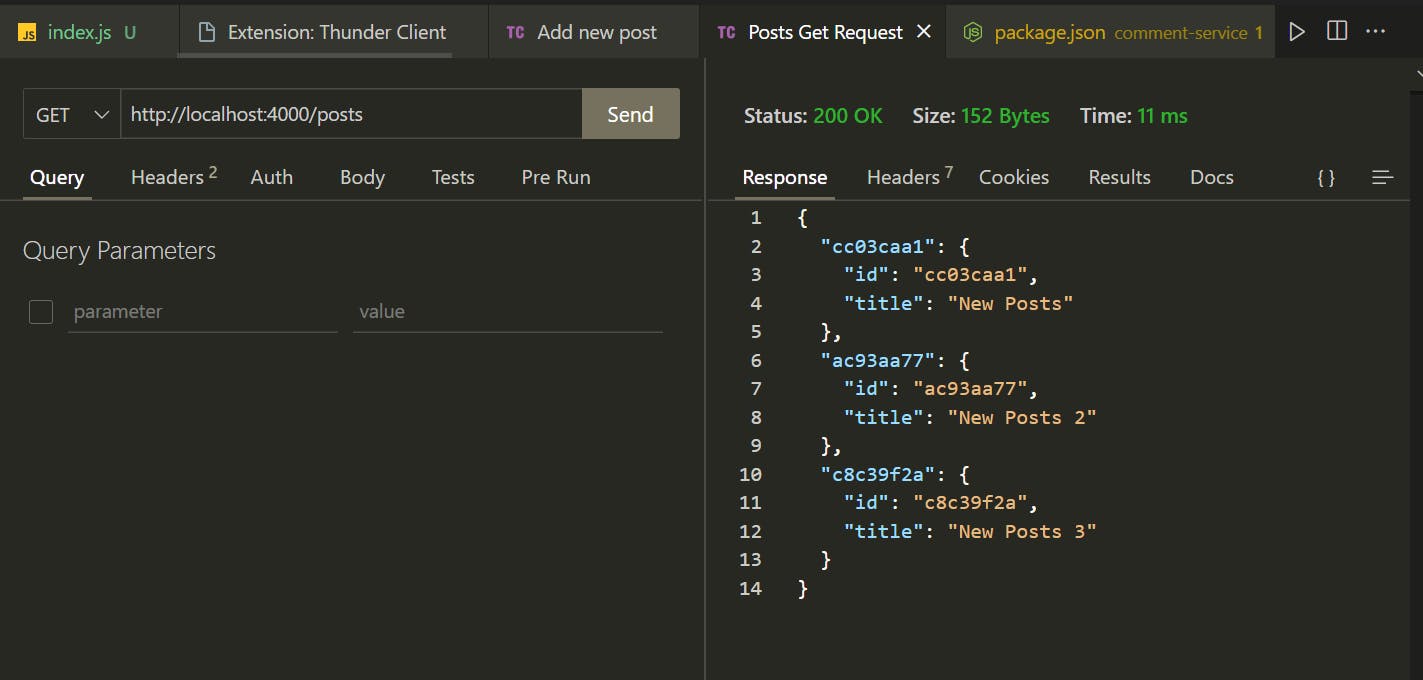
Pay attention to the format of the returned JSON:
{
  "cc03caa1": {  // a single post as post id as key and the entire post and its id in from of an object as value.
    "id": "cc03caa1",
    "title": "New Posts"
  },
  "ac93aa77": {
    "id": "ac93aa77",
    "title": "New Posts 2"
  },
  "c8c39f2a": {
    "id": "c8c39f2a",
    "title": "New Posts 3"
  }
}
With the post service operational, let's integrate it with the frontend.
Step 1: Launch the Frontend
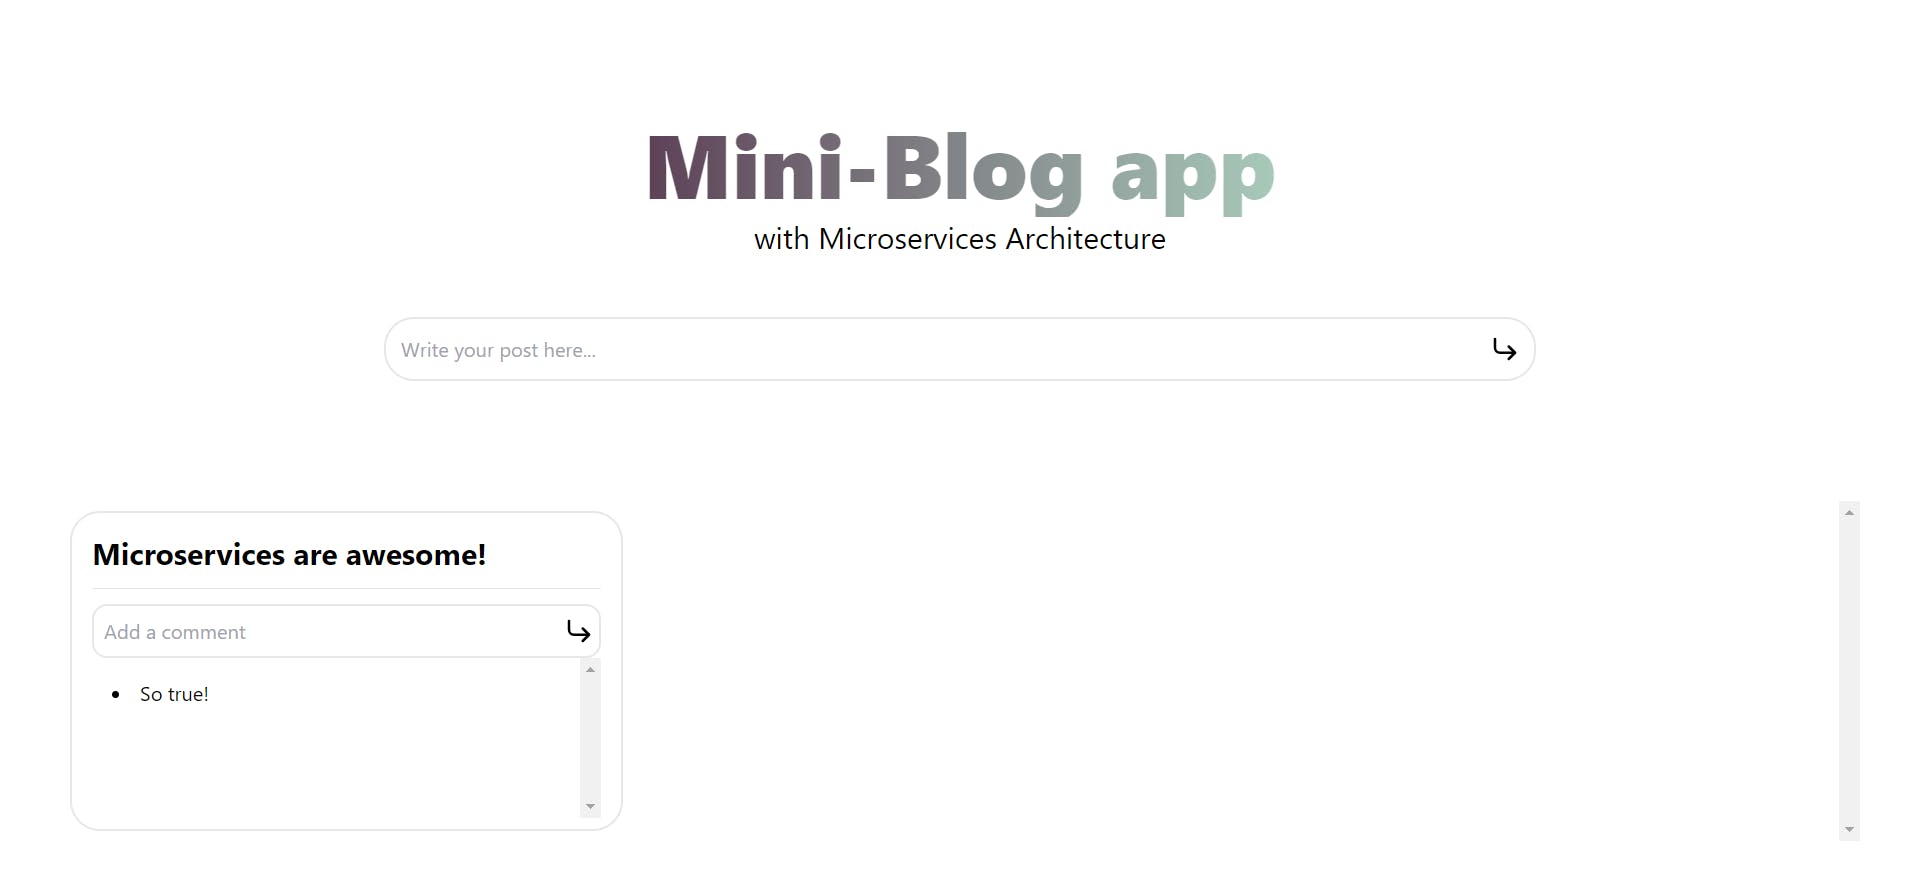
While keeping the post service running, navigate to the client directory and initiate the React app by executing npm start. You'll observe a placeholder post and a comment on your page.
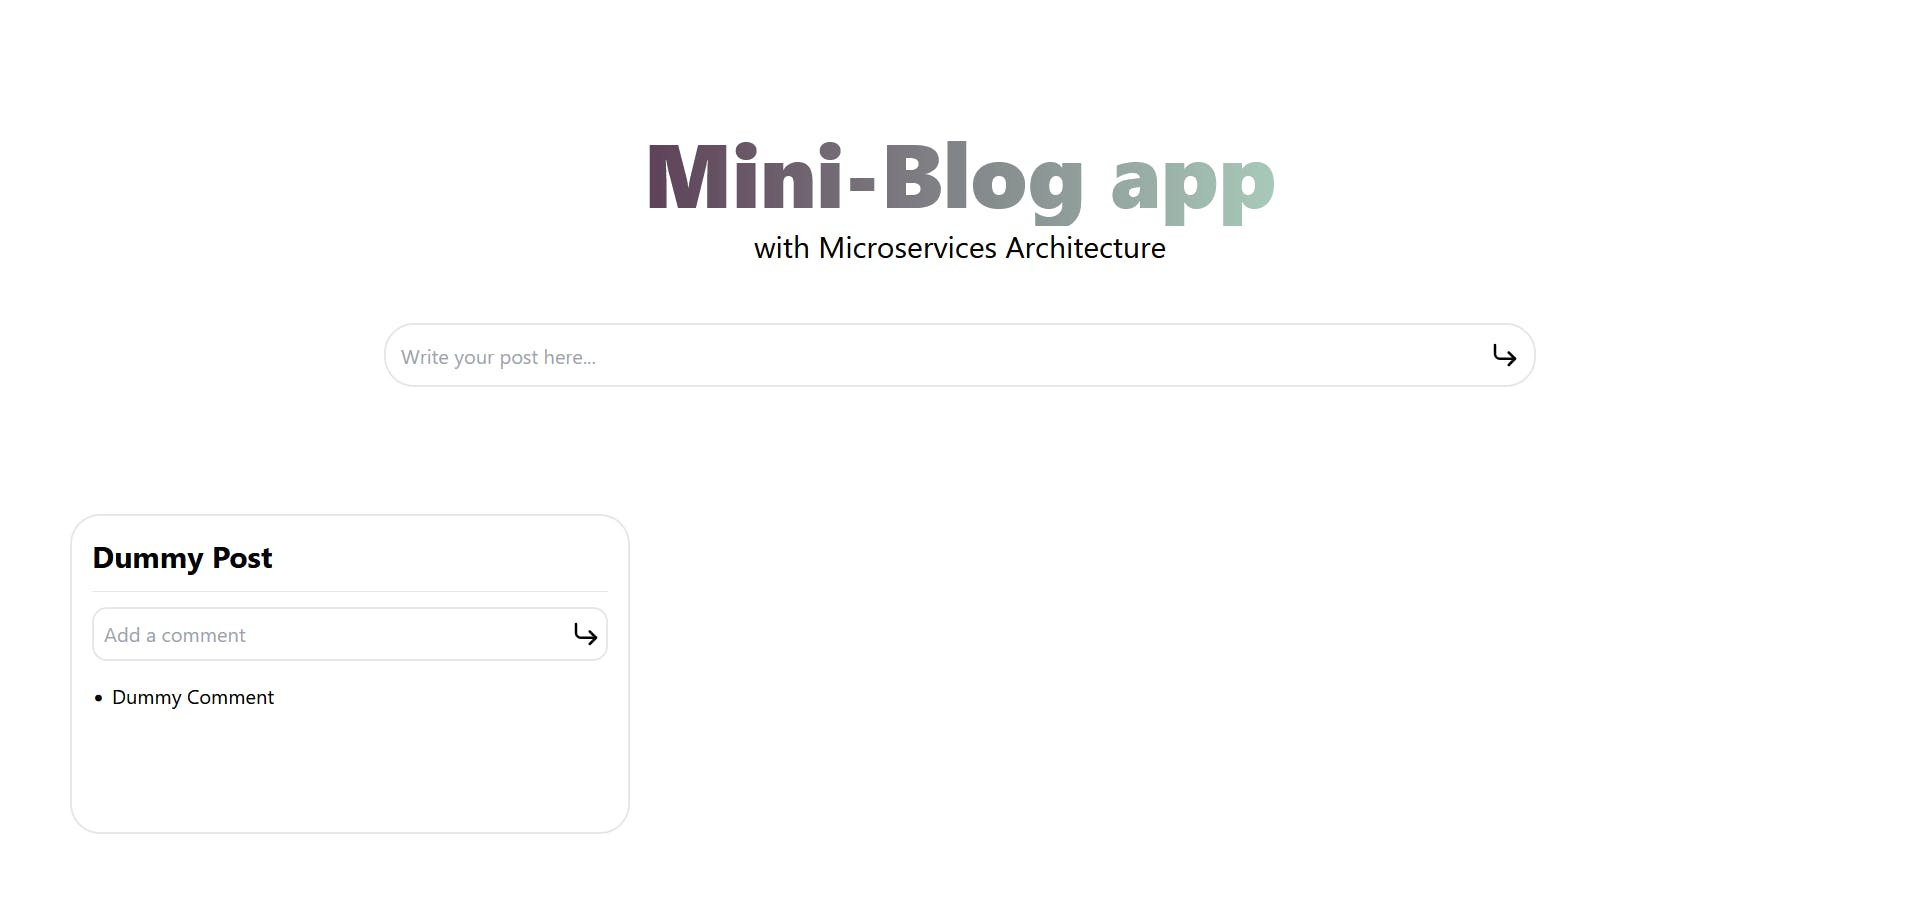
Although attempting to create a post at this point won't yield results, it's advisable to examine the component structure that I setup in our client before proceeding with the necessary client code modifications.
Step 2: Enable Post Submission
Inside App.js, in client folder:
import { useState } from 'react';
import './App.css';
import CreatePost from './components/CreatePost';
import Postlist from './components/Postlist';

function App() {

  const [newPost,setNewPost]=useState("");  // A useState variable to manage input element.

  return (
    <div className='h-screen flex justify-around flex-col gap-8'>
      <div className='flex flex-col justify-center items-center mt-8 md:mt-24'>
        <h1 className='text-4xl sm:text-5xl md:text-6xl lg:text-7xl space-y-6 text-transparent bg-clip-text font-extrabold bg-gradient-to-r from-[#5D4157] to-[#A8CABA] pb-2'>
          Mini-Blog app
        </h1>
        <p className='text-md sm:text-lg md:text-xl lg:text-2xl'>with Microservices Architecture</p>
      </div>
      <CreatePost
        //Passing this variable to create post component
        post={newPost}
        setPost={setNewPost}
      />
      <Postlist />
    </div>
  );
}

export default App;
Inside CreatePost.js:
import { CornerDownRight } from 'lucide-react';

export default function CreatePost({post,setPost}) {

  return (
    <section className='w-screen flex items-center justify-center relative'>
      <input
        className='w-[80%] sm:w-[75%] md:w-[70%] lg:w-[60%] border-2 p-3 rounded-3xl'
        placeholder='Write your post here...'
        value={post}
        onChange={(e)=>setPost(e.target.value)}
      />
      <CornerDownRight
          className='absolute right-14 sm:right-32 md:right-44 lg:right-80 cursor-pointer'
      />
    </section>
  );
}
With the input value available, we can now submit it to our backend when the user clicks on the Enter button.
In App.js, ensure you have that you have axios imported at the top, and then add this asynchronous function within the App component:
import axios from 'axios';  // Don't forget to import axios

// In App function

async function handleCreatePost() {
  try {
    await axios.post("http://localhost:4000/posts/create", { post: newPost });
  } catch (error) {
    console.log(error);
  } finally {
    setNewPost("");
  }
}
Pass it as a prop to the CreatePost component:
<CreatePost
        post={newPost}
        setPost={setNewPost}
        handleCreatePost={handleCreatePost}
/>
In CreatePost.js, when a user clicks, we'll utilize the handleCreatePost function:
import { CornerDownRight } from 'lucide-react';

export default function CreatePost({post,setPost,handleCreatePost}) {

  return (
    <section className='w-screen flex items-center justify-center relative'>
      <input
        className='w-[80%] sm:w-[75%] md:w-[70%] lg:w-[60%] border-2 p-3 rounded-3xl'
        placeholder='Write your post here...'
        value={post}
        onChange={(e)=>setPost(e.target.value)}
      />
      <CornerDownRight
        onClick={handleCreatePost}
        className='absolute right-14 sm:right-32 md:right-44 lg:right-80 cursor-pointer'
      />
    </section>
  );
}
Step 3: Fetch and Display Posts
Now, we'll integrate the functionality to fetch and display posts.
In App.js:
 import { useState, useEffect } from 'react';  // Don't forget to import useEffect
import axios from 'axios';  // Don't forget to import axios
import './App.css';
import CreatePost from './components/CreatePost';
import Postlist from './components/Postlist';

function App() {
  const [newPost, setNewPost] = useState("");  // State variable to manage input element.
  const [allPosts, setAllPosts] = useState({}); // State variable to store all posts

  // Function to fetch all posts
  function fetchAllPosts() {
    axios.get("http://localhost:4000/posts")
      .then((result) => {
        setAllPosts(result.data);
      })
      .catch((error) => {
        console.log(error);
      });
  }

  // Fetch all posts when the website is first loaded
  useEffect(() => {
    fetchAllPosts();
  }, []);

  // ...Rest of the code
}

export default App;
Modify the handleCreatePost function to refresh the list of posts after a new post is created:
 async function handleCreatePost() {
  try {
    await axios.post("http://localhost:4000/posts/create", { post: newPost });
  } catch (error) {
    console.log(error);
  } finally {
    setNewPost("");
    fetchAllPosts();
  }
}
In App.js, pass the allPosts data to the PostList component and replace the placeholder posts:
<Postlist allPosts={allPosts}/>
In PostList.js, replace the placeholder object with allPosts data:
import PostCard from './PostCard';

export default function Postlist({allPosts}) {
  return (
    <div className='m-12 p-2 grid grid-cols-1 md:grid-cols-2 lg:grid-cols-3  gap-10 overflow-y-scroll'>
      {Object.values(allPosts).map((post) => {
        return <PostCard key={post.postId} post={post} />;
      })}
    </div>
  );
}
With these changes, the post creation functionality should be operational. Ensure both the client and post-service are running. This integrated functionality will allow you to create posts and view them on your frontend.
Comment Service
Now, let's set up the comment service in a similar manner to how we did for the post service. We'll begin by creating the necessary infrastructure and then implement the code for the comment service.
- Setting Up Comment Service:
Open the index.js file inside the comment-service folder:
const express = require('express');
const cors = require('cors');
const axios = require('axios');
const { randomBytes } = require('crypto');

const app = express();
app.use(express.urlencoded({ extended: true }));
app.use(express.json());
app.use(cors());

const PORT = 4001;
const commentsByPostId = {};

app.listen(PORT, () => {
  console.log(`Comment Service is live at port: ${PORT}`);
});
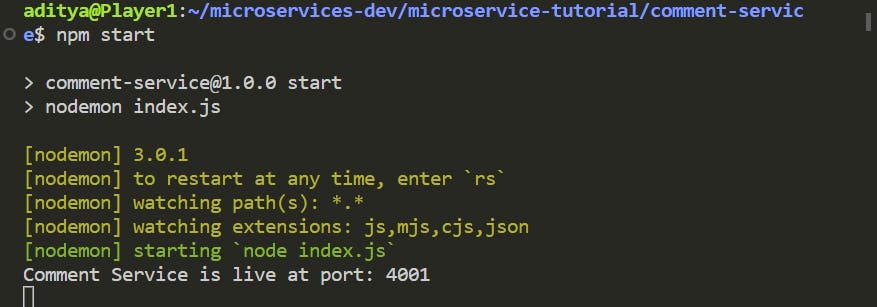
Upon running the command npm start in the terminal from within the comment-service folder, you should see:
- Adding Comment Creation Route:
Now, let's implement the route to allow users to save comments. We will create a POST route for this purpose:
const commentsByPostId = {}; // Make sure this is present somewhere above.

app.post('/posts/:postId/comments', (req, res) => {
  const postId = req.params.postId;
  const newCommentId = randomBytes(4).toString('hex');
  const { comment } = req.body;
  const allComments = commentsByPostId[postId] || [];

  allComments.push({ commentId: newCommentId, comment });
  commentsByPostId[postId] = allComments;
  res.status(201).send(commentsByPostId[postId]);
});
When a POST request is made to this route, it will save the comment in the commentsByPostId object, with the following format:
{
    "asda21qs": [  // this will the post id that we sent with the request.
       {
        "commentId":"rhhr23we",  // this is the comment id that we just generated with randomBytes
        "comment":"Some Comment"  //  and this is our comment
       },
       {
        "commentId":"rhsdr23we",  // this is the comment id that we just generated with randomBytes
        "comment":"Another Comment"  //  and this is our comment
       },
    ]
}
- Adding Comment Retrieval Route:
Next, we'll implement a GET route to retrieve comments for a specific post:
app.get('/posts/:postId/comments', (req, res) => {
  const postId = req.params.postId;
  res.status(201).send(commentsByPostId[postId] || []);
});
With these routes in place, our comment service is ready to go.
- Integrating Comment Service with Frontend:
To integrate the comment service with the frontend, we'll need to make some modifications to the frontend code. The changes will be made in the PostCard component located in the client/src/components.js file:
import { useEffect, useState } from 'react';
import Commentlist from './Commentlist';
import CreateComment from './CreateComment';
import axios from "axios";

export default function PostCard({ post }) {
  const [newComment, setNewComment] = useState('');
  const [allComments,setAllComments]=useState(post.comments||[]);

  async function fetchComments(){
    let response=null;
    try{
      response = await axios.get(`http://localhost:4001/posts/${post.postId}/comments`);
      console.log(response);
      setAllComments(response.data)
    }catch(error){
      console.log(error);
    }
  }

  async function handleCreateComment(){
    let response=null;
    try{
      response = await axios.post(`http://localhost:4001/posts/${post.postId}/comments`,{comment:newComment});
    }catch(error){
      console.log(error);
    }finally{
      setNewComment("");
      setAllComments(response.data);
      console.log(response);
    }
  }

// Fetch comments on initial loading of the application
useEffect(()=>{
    fetchComments();
  },[])


  return (
    <div className='border-2 h-64 rounded-3xl p-4'>
      <h1 className='font-bold text-2xl'>{post.post}</h1>
      <hr className='my-3' />
      <CreateComment
        handleCreateComment={handleCreateComment}
        newComment={newComment}
        setNewComment={setNewComment}
      />
      <Commentlist
        comments={allComments}
      />
    </div>
  );
}
And, in CreateComment component located in the client/src/components.js file:
import { CornerDownRight } from 'lucide-react';

export default function CreateComment({
  handleCreateComment,
  newComment,
  setNewComment,
}) {
  return (
    <div className=' border-2 p-2 rounded-xl relative'>
      <input
        placeholder='Add a comment'
        className='outline-none w-[90%]'
        value={newComment}
        onChange={(e) => setNewComment(e.target.value)}
      />
      <CornerDownRight
        onClick={handleCreateComment}
        className='absolute right-1 top-2 cursor-pointer'
      />
    </div>
  );
}
By making these changes, the comment service should now be operational and integrated with the frontend. Users can add comments to posts, and those comments will be saved and retrieved using the comment service.
This is how our application currently look, architecture wise.
Streamlining Communication Among Microservices
Currently, you might have noticed that we are making numerous requests to our backend. Consider a scenario where we have 3 posts, each with some number of comments. In this case, we would need to make a total of 1+3 = 4 requests to the backend (One to fetch all posts and 3 requests from 1 each from PostCard to fetch all the comments). As the number of posts and comments grows, the number of requests increases. This situation could potentially impact the performance of our application. To address this, we introduce a new service: the query service.
The query service plays a crucial role in optimizing communication between services. It stores both posts and comments, allowing it to efficiently return posts alongside their associated comments. By consolidating this data, we can significantly reduce the number of requests required. This transformation can be likened to condensing those 4 requests into just 1, resulting in a substantial improvement in efficiency.
While implementing this in a monolithic architecture might be straightforward, the microservices environment adds complexity. Specifically, we need to devise a means for the query service to communicate effectively with both the post and comment services. As new comments and posts are created, the query service should maintain a record of these elements, enabling it to provide comprehensive data to users.
In the realm of microservices communication, several approaches are available. For this tutorial, we'll employ asynchronous communication via an event bus. This event bus, a dedicated service, acts as an intermediary for inter-process communication. Whenever new posts or comments are created, they trigger a request to the event route hosted on the event bus's designated port. Upon reaching this event route, information about the newly created post or comment is broadcasted. Broadcasting, in this context, refers to the act of transmitting this information to all relevant services subscribed to the event bus.
To materialize this concept, let's start with the implementation. We'll begin by setting up the event bus, which serves as the cornerstone for these asynchronous communications.
Event bus
Within the event bus directory, begin by creating an index.js file. Here, we will set up the event bus service, allowing it to listen on port 4005. This port can be customized, but it's important to ensure distinct ports for all services.
const express = require('express');
const cors = require('cors');
const axios = require('axios');

const app = express();
app.use(express.urlencoded({ extended: true }));
app.use(express.json());
app.use(cors());

const PORT = 4005;

app.listen(PORT, () => {
  console.log(`Event Bus live on port: ${PORT}`);
});
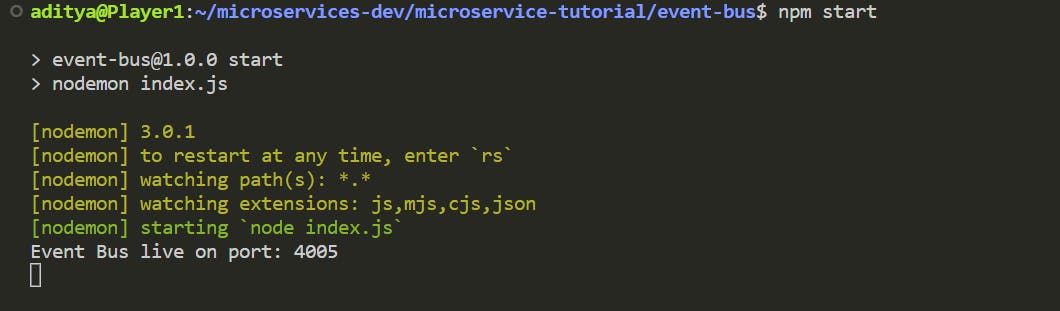
After starting the event bus service with npm start, the console should display:
With the event bus operational, let's introduce a new route named "events" that will listen for requests from both the post and comment services.
app.post('/events', (req, res) => {
    res.send({}).status(200); // Sending 200 to prevent "request failed" messages in the terminal when post-service or comment-service make requests to this path.
});
Now, when a new post is created in the post service, we want to emit an event, In order to achieve this modify /post/create route in index.js of post service.
const axios = require("axios"); // Make sure you have axios imported at the top.

app.post('/posts/create', (req, res) => {
  const id = randomBytes(4).toString('hex');
  const { title } = req.body;
  posts[id] = {
    id,
    title,
  };

  axios
    .post('http://localhost:4005/events', {
      type: 'PostCreated',
      postId: id,
      post: title,
    })
    .then(() => {
      console.log('Successfully emmited post created event');
    })
    .catch((error) => {
      console.log(
        'There was an error while emmiting post created event: ',
        error
      );
    });

  res.status(201).send(posts[id]);
});
Similarly, in the comment service's index.js, adjust the code within the /posts/:postId/comments route:
const axios = require("axios"); // Make sure you have axios imported at the top.

app.post('/posts/:postId/comments', (req, res) => {
  const postId = req.params.postId;
  const newCommentId = randomBytes(4).toString('hex');
  const { comment } = req.body;
  const allComments = commentsByPostId[postId] || [];

  axios
    .post('http://localhost:4005/events', {
      type: 'CommentCreated',
      postId: postId,
      commentId: newCommentId,
      comment: comment,
    })
    .then(() => {
      console.log('Comment Created Event Emitted Successfully!');
    })
    .catch((error) => {
      console.log(
        'There was an error while emitting comment created event: ',
        error
      );
    });

  allComments.push({ commentId: newCommentId, comment });
  commentsByPostId[postId] = allComments;
  res.status(201).send(commentsByPostId[postId]);
});
As events are now emitted from both the post and comment services and accessible by the event bus, we need to broadcast them to the relevant services. To accomplish this, modify the events route within the event bus's index.js:
const axios = require("axios"); // Make sure this is present at the top.

app.post('/events', (req, res) => {

    const event = req.body;

    console.log("An new event was catched by the event bus");

    axios.post('http://localhost:4000/events',event).then(()=>{
        console.log('Broadcasted the new event to post service');
    }).catch((error)=>{
        console.log(error);
    })

    axios.post('http://localhost:4001/events',event).then(()=>{
        console.log('Broadcated the new event to comment service');
    }).catch((error)=>{
        console.log(error);

    res.send({}).status(200);

});
Now, all events caught by the event bus become accessible to all active services.
1. The frontend creates a new post.
2. An event is emitted from the post service.
3. The event is caught by the event bus.
4. The event is broadcasted to all the available services.
5. The same process applies for comment-related events.
Query Service
With the event bus functioning effectively, the next step is to implement the query service. This service will manage the retrieval and storage of data based on events emitted by other services. The query service's key role is to maintain a coherent and comprehensive dataset that can be easily queried and presented to users.
Let's proceed with creating the query service by adding an index.js file within the query folder. To begin, we'll set up the service to listen on port 4003:
const express = require('express');
const cors = require('cors');
const axios = require('axios');

const app = express();
app.use(express.urlencoded({ extended: true }));
app.use(express.json());
app.use(cors());
const PORT = 4003;

const allPosts = {};

app.listen(PORT, () => {
  console.log(`Query service live at port: ${PORT}`);
});
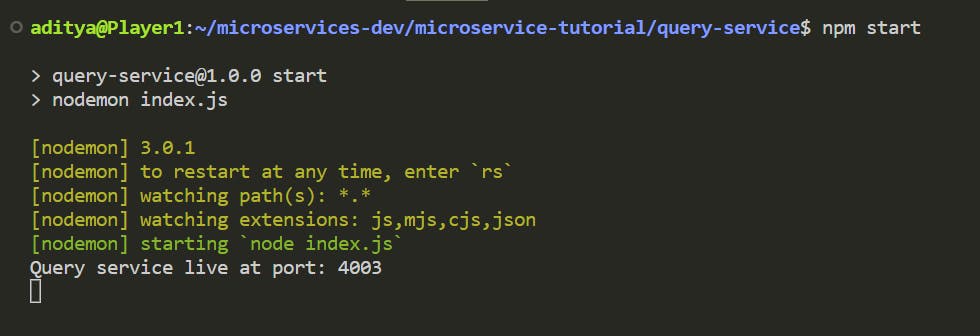
Upon executing npm start within the query service folder, the console should display:
Now, let's add the event route to the query service, allowing it to catch events that will be broadcasted from the event bus:
app.post('/events', (req, res) => {
    res.send({}).status(200);
});
With the events route prepared in the query service, we can modify the event bus to broadcast events to this service as well. Within the events-bus directory, in the events route:
app.post('/events', (req, res) => {

    const event = req.body;

    // Broadcasting to the post service
    axios.post('http://localhost:4000/events', event).then(() => {
        console.log('Broadcasted the new event to post service');
    }).catch((error) => {
        console.log(error);
    });

    // Broadcasting to the comment service
    axios.post('http://localhost:4001/events', event).then(() => {
        console.log('Broadcasted the new event to comment service');
    }).catch((error) => {
        console.log(error);
    });

    // Broadcasting to the query service
    axios.post('http://localhost:4003/events', event).then(() => {
        console.log('Broadcasted the new event to query service');
    }).catch((error) => {
        console.log(error);
    });

    res.send({}).status(200);
});
This completes the setup for the query service, allowing it to receive events broadcasted by the event bus. The query service will use these events to maintain an up-to-date record of posts and comments.
With the events effectively captured by the query service, it's time to store and manage the data – both posts and comments – using these emitted events. Inside the events route of the query service, we'll implement the logic for handling different event types.
app.post('/events', (req, res) => {
   // Desturcturing the data send as the body.
  const { type } = req.body;
// if the event is of the type post created.
  if (type === 'PostCreated') {
    const { postId, post } = req.body;
    console.log(`Catched post created event, Post: ${post} with Id: ${postId}`);
    allPosts[postId] = {
      postId: postId,
      post: post,
      comments: [],
    };
    res.send({}).status(200);
// if event is of the type comment created
  } else if (type === 'CommentCreated') {
    console.log(req.body);
    const { postId, commentId, comment } = req.body;
    console.log(
      `Catched comment created event, Comment: ${comment} with comment id: ${commentId} and post id ${postId}`
    );
    allPosts[postId].comments.push({
      commentId: commentId,
      comment: comment,
    });
    console.log(allPosts);
    res.send({}).status(200);
  }
});
We've now established a system where posts and comments are saved in the allPosts object within the query service. Each post entry includes its ID, content, and an array of associated comments.
To facilitate data retrieval, we'll add a route that allows clients to fetch all posts along with their comments:
app.get('/query/all-posts', (req, res) => {
  res.send(allPosts).status(201);
});
Although the post-service and comment-service routes don't need to process any events for this tutorial, we still need to ensure that when the event bus broadcasts an event, the requests in these services don't remain unresolved. We achieve this by adding an event route to both services:
app.post('/events', (req, res) => {
    res.send({}).status(200);
});
On the client side, we can now simplify the data retrieval process. In the App.js file, we adjust the code to retrieve posts and comments exclusively from the query service:
import { useEffect, useState } from 'react';
import './App.css';
import CreatePost from './components/CreatePost';
import Postlist from './components/Postlist';
import axios from "axios";

function App() {

  const [newPost,setNewPost]=useState("");
  const [allPosts,setAllPosts]=useState({});


  useEffect(()=>{
    fetchAllPosts(); // Fetching all posts on component mount
  },[])

  async function handleCreatePost(){
    try{
      await axios.post("http://localhost:4000/posts/create",{title:newPost});
    }catch(error){
      console.log(error);
    }finally{
      setNewPost("");
      fetchAllPosts(); // Fetching all posts after creating a new one
    }
  }

   // We are fetching all the posts from query service instead of the post service.
  function fetchAllPosts(){
    axios.get("http://localhost:4003/query/all-posts").then((result)=>{
      console.log(result.data);
      setAllPosts(result.data);
    }).catch((error)=>{
      console.log(error);
    });
  }

  return (
    <div className='h-screen flex justify-around flex-col gap-8'>
      <div className='flex flex-col justify-center items-center mt-8 md:mt-24'>
        <h1 className='text-4xl sm:text-5xl md:text-6xl lg:text-7xl space-y-6 text-transparent bg-clip-text font-extrabold bg-gradient-to-r from-[#5D4157] to-[#A8CABA] pb-2'>
          Mini-Blog app
        </h1>
        <p className='text-md sm:text-lg md:text-xl lg:text-2xl'>with Microservices Architecture</p>
      </div>
      <CreatePost
        post={newPost}
        setPost={setNewPost}
        handleCreatePost={handleCreatePost} />
      <Postlist allPosts={allPosts} />
    </div>
  );
}

export default App;
some changes in PostCard.js as well:
import { useEffect, useState } from 'react';
import Commentlist from './Commentlist';
import CreateComment from './CreateComment';
import axios from "axios";

export default function PostCard({ post }) {
  const [newComment, setNewComment] = useState('');
  const [allComments,setAllComments]=useState(post.comments||[]);

  async function handleCreateComment(){
    let response=null;
    try{
       // This is so that we could update the comment component immediately after creating the new comment.
      response = await axios.post(`http://localhost:4001/posts/${post.postId}/comments`,{comment:newComment});
    }catch(error){
      console.log(error);
    }finally{
      setNewComment("");
      setAllComments(response.data);
      console.log(response);
    }
  }

// We now no longer need to fetch the comments seperately.
  // function fetchAllComments(){
  //   axios.get(`http://localhost:4001/posts/${post.id}/comments`).then((result)=>{
  //     console.log(result.data);
  //     setAllComments(result.data);
  //   }).catch((error)=>{
  //     console.log(error);
  //   })
  // }

  return (
    <div className='border-2 h-64 rounded-3xl p-4'>
      <h1 className='font-bold text-2xl'>{post.post}</h1>
      <hr className='my-3' />
      <CreateComment
        handleCreateComment={handleCreateComment}
        newComment={newComment}
        setNewComment={setNewComment}
      />
      <Commentlist
        comments={allComments}
      />
    </div>
  );
}
With this, we have now successfully implemented our mini blog app.
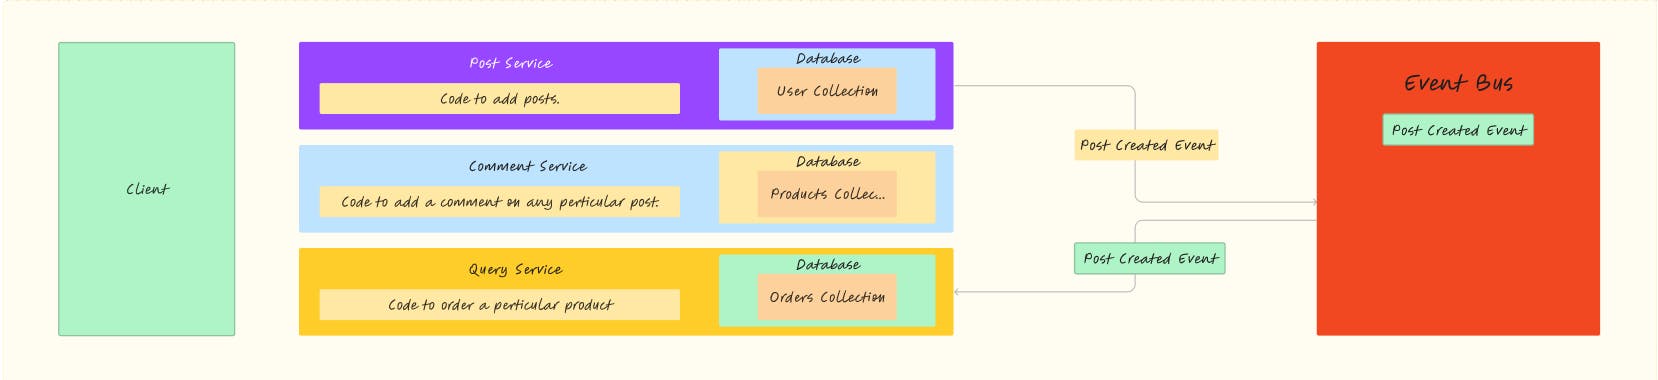
By now, our backend architecture is well-established like this:
I hope you've found this tutorial insightful and engaging. Throughout this journey, I tried my best to provide hands-on experience with microservices architecture, asynchronous communication, and event-driven design.
If you have any questions or need further clarification on any aspect of this tutorial, please don't hesitate to ask in the comments section.
Thank you for joining me on this microservices adventure! Keep an eye out for my upcoming blog, where I'll we will together delve into more such exciting topics. Until then, happy coding!👋